Looking to use Gmail with custom domain of yours? Gmail is probably the best email service combined with features and ease of use.
In this tutorial, I’ll show you how you can use Gmail with custom domain for FREE.
Now, I’ll also tell 1 paid method.
Don’t have a domain yet, grab one from Domain.com quickly, the best domain registrar.
Let’s Start NOW:
#1: The FREE Method
First, I’ll show you the free method. Now, before we proceed, you must have two things:
- A Normal G-Mail Account: You must have a personal account like [email protected] to proceed further.
- You Must Have Web Hosting or E-Mail Hosting.
If you do not have web hosting you can grab it easily from Hostinger, the most affordable and feature-rich host with plans from just $0.99/month…
(In fact, this website is hosted on Hostinger Only)
If you do not want a website, and only need an email, then Hostinger offers that too!
I’ll be using Hostinger as the example web host in this tutorial.
Step 1: Create a Free G-Mail Account
Click on this link: https://accounts.google.com/signup?hl=en
Next, enter your username and create your account.
Step 2: Create an E-Mail at your Web Host
The next step is to create an e-mail at your web host. We’ll use Hostinger as an example for this tutorial.
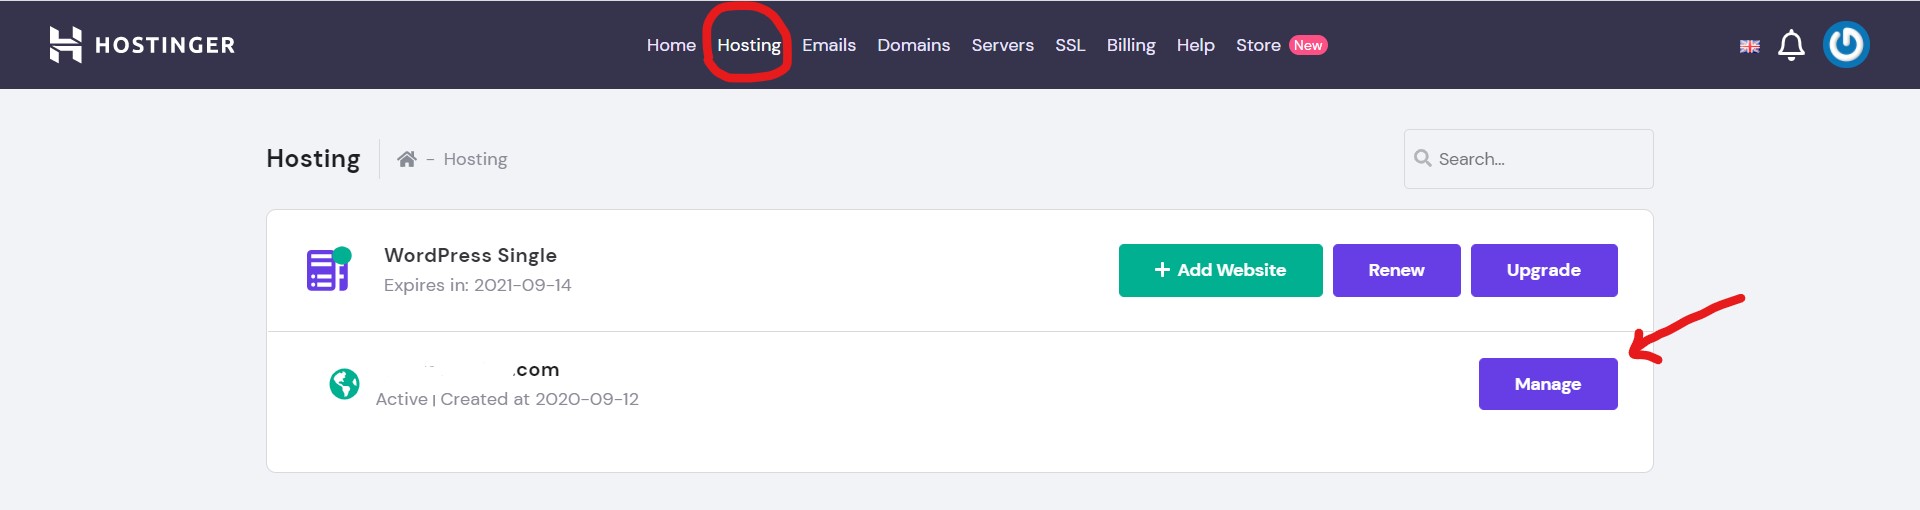
After you are in your Cpanel, just click on “Hosting” and then on Manage:
After that scroll down, until you come to the E-Mails section.
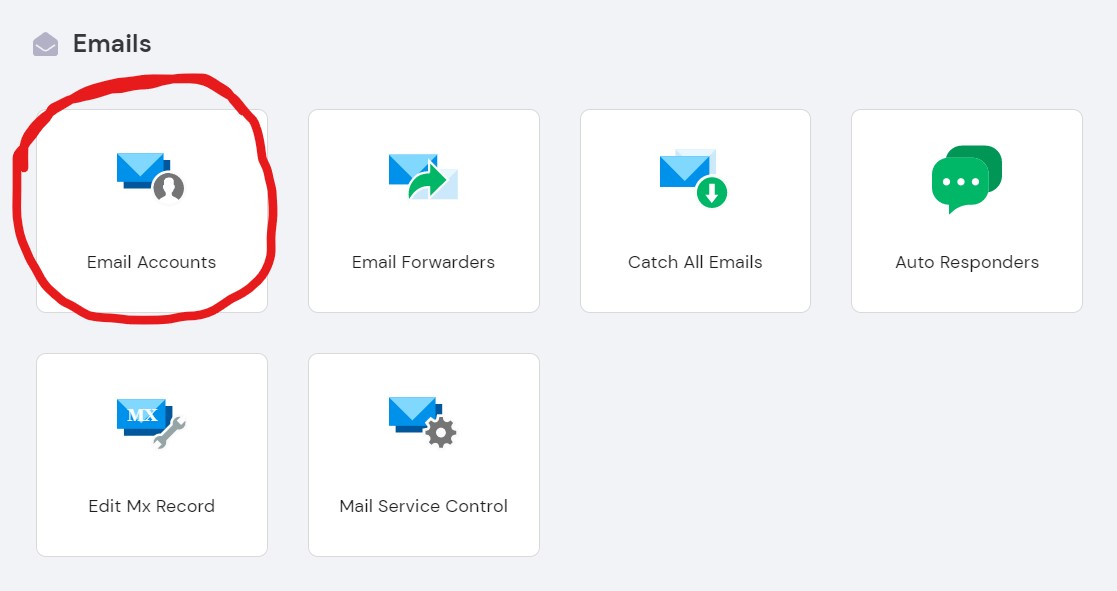
Here, select E-Mail Accounts and then scroll until you come to this section, Create a new E-Mail:
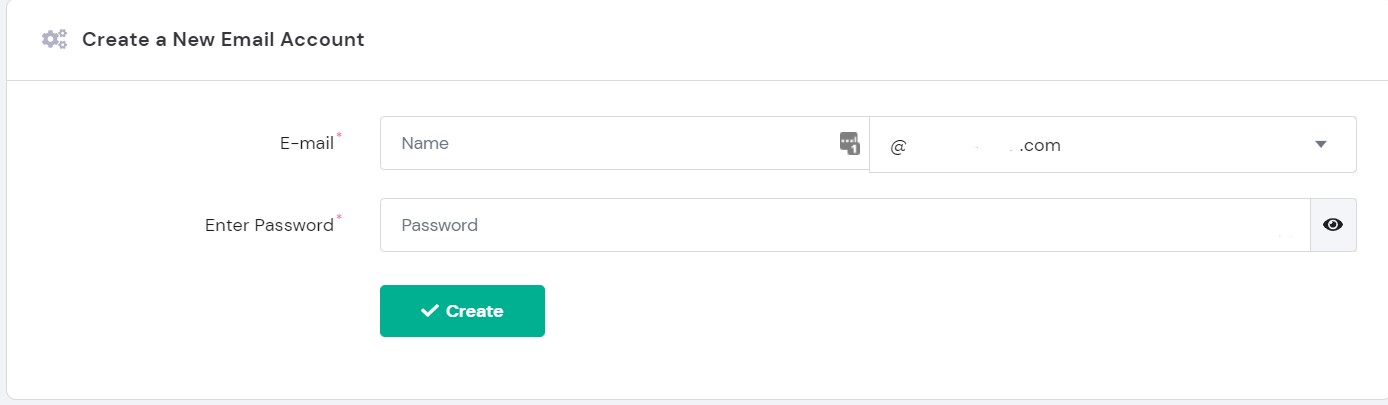
Here enter your username and password and you’re done!
Step 3: Configuring a bit of G-Mail Settings
Now, that you have made your E-Mail, it’s time to set it up with G-Mail.
For that, go to your G-Mail Account and click on settings:
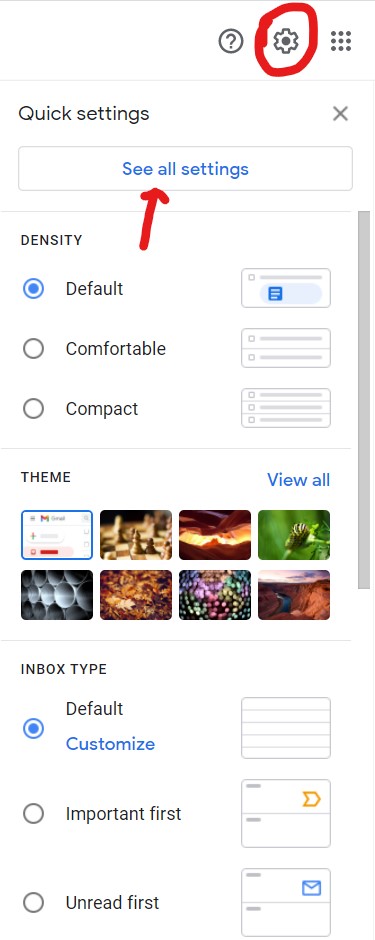
Now, select see all settings and then you’ll access the advanced settings. Now, click on ‘Accounts and Import’.
You’ll see this screen:

Now click on the Add a mail account link (highlighted in the image).
Step 4: Configuring POP3 and SMTP Servers
Now,come the important steps. You’ll see this screen:
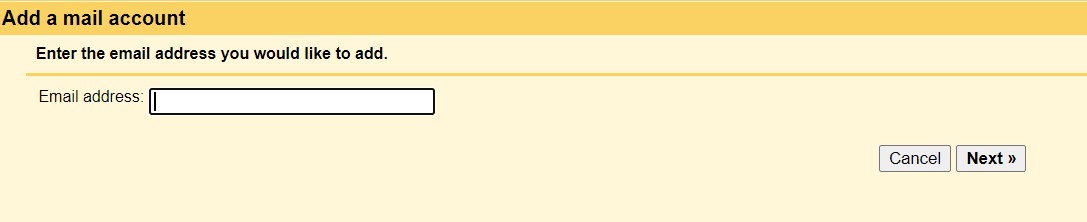
Enter your E-Mail address you created at Hostinger or your web host.
Step 2: Select POP3 on the next screen.
Step 3: You’ll see this screen:
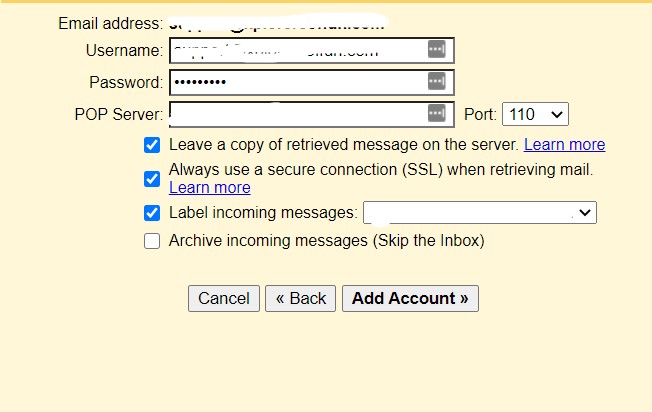
Here in the username field, enter your email and in the password enter the password you entered at your host. Next, enter your POP Server.
If you are on Hostinger, then go to the Account E-Mails section and you’ll see your E-Mail Settings
Here’s how they look:
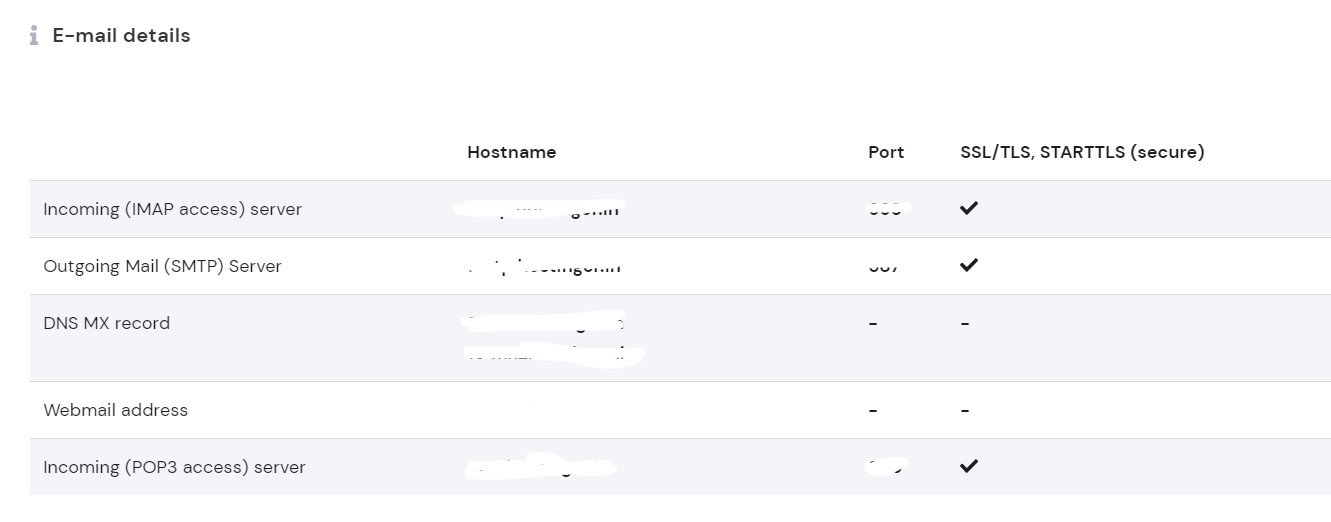
I have blurred by E-Mail Settings…
Now, copy the POP3 Server hostname from here and then paste it into the G-Mail Settings.
Leave the first 3 boxes in Gmail checked

Now, click on Add Account. Next, you’ll have to select whether you want to send E-Mails with your account or not. If NO, then you’re good to go.
But if YES, then follow this tutorial!
I’ll select YES.
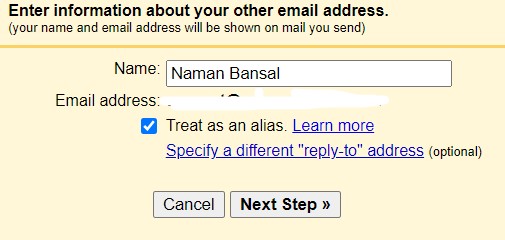
Here, enter your Name and then checkbox ‘Treat as Alias’.
Next, you’ll have to enter your SMTP Server Details.

Enter your SMTP ID and username is your E-Mail. Password is the password that you entered at your host. Next, select your security as TLS.
Now, you’ll be sent an E-Mail with a verification code in it. Copy it and paste in the next screen.
Now, your E-Mail is Added!
You can now receive and send E-Mails with your domain email in G-Mail…
#2: Using Google Workspace
The second way is by using Google Workspace a paid service by Google for this specific purpose. Since this article is about FREE ways, I won’t go into this method.
#3: Using G Suite for Classroom (For Schools ONLY)
Google offers a free service called G-Suite for Classroom which lets you create an email on a domain but it’s only for institutions. If you are not an institution, you won’t get it. Now, don’t try and trick Google because Google manually approves each account. So if you are a business thinking of using Google classroom for your purpose, don’t even think so. You’ll also need a school website for that.
Check this article for learning how to set up G Suite for Classroom.
FAQ
Conclusion
That’s it for today. So, you now know 2 methods of getting Gmail with your domain for FREE and 1 is PAID.
I would recommend the first one as this is what I use!
Now,tell me which method will you use:
- Is it by configuring POP3 and SMTP
- Or by using G-Suite?
Let me know in the comments below!