Image Carousels look really premium and are used quite a lot on the web now. This tutorial will show you how to add an image carousel in WordPress easily. The sliders will be easy to create, free, and most importantly responsive (which means that they will look good on all devices) We will be using 2 plugins today to get our work done!
Let’s get started!
MetaSlider
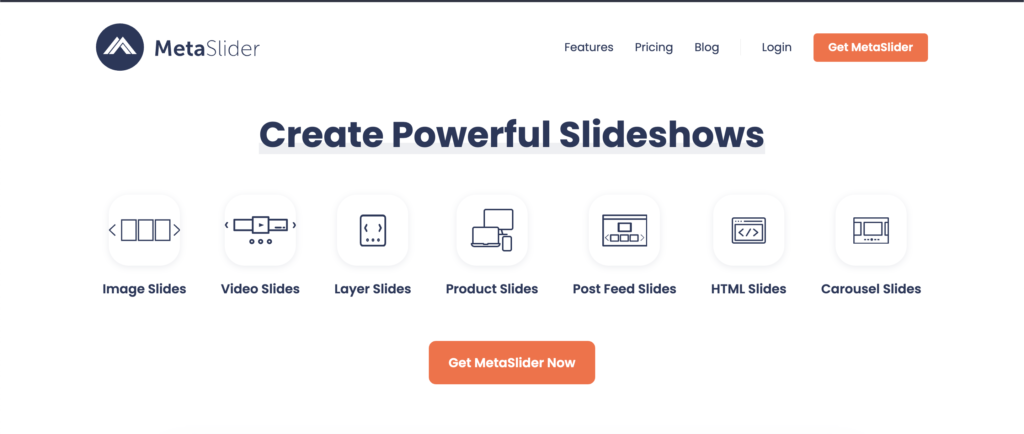
MetaSlider is a very popular plugin used to create responsive and SEO optimized carousels and sliders of photos, videos, posts, etc…
Some of its top features are:
- Easy to use
- Works with the Gutenberg editor
- Resposive sliders
- Various designs
- Integrations with other plugins
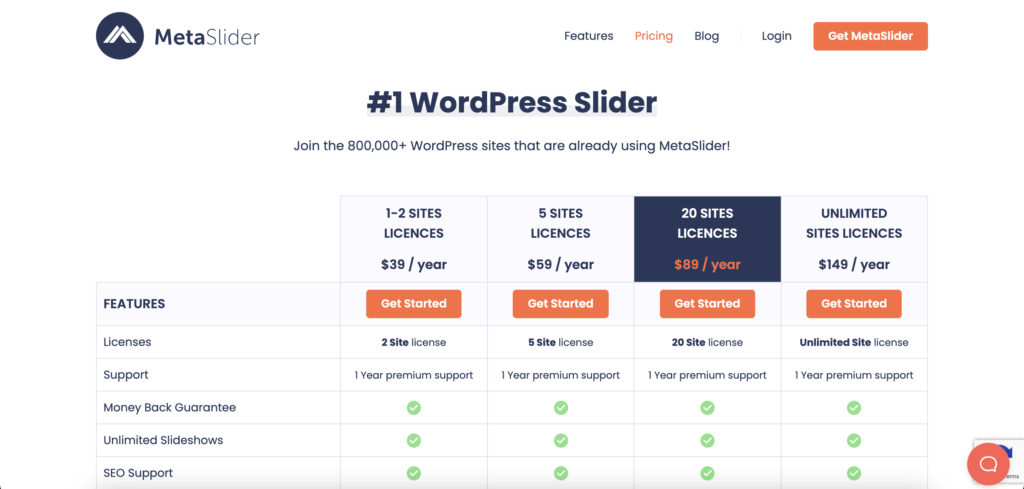
Pricing
There is a free version of MetaSlider available in the WordPress Repository. The paid plans start at $39/year and go to $149/year depending upon the number of sites.
Tutorial
Step 1. After you have downloaded the plugin, go to some post on your website and then in the Gutenberg editor, click on the ‘+’ button on the top and from there select the option which says ‘Meta Slider’.
Step 2. Now you will see that Meta Slider shows ‘You have created no slideshows. Create One!’ Click on the Create text and you will be dropped into an editor. Here’s what it looks like:
Now, click on the option which says ‘New’.
Step 3. Now you will be in a slideshow editor and you will be guided by a setup wizard. Click on the ‘Add Slide’ button to add images. Now upload and drop your images or you can also use the Unsplash Library. Once you have selected the image you want, click on the ‘Add Slideshow’ button.
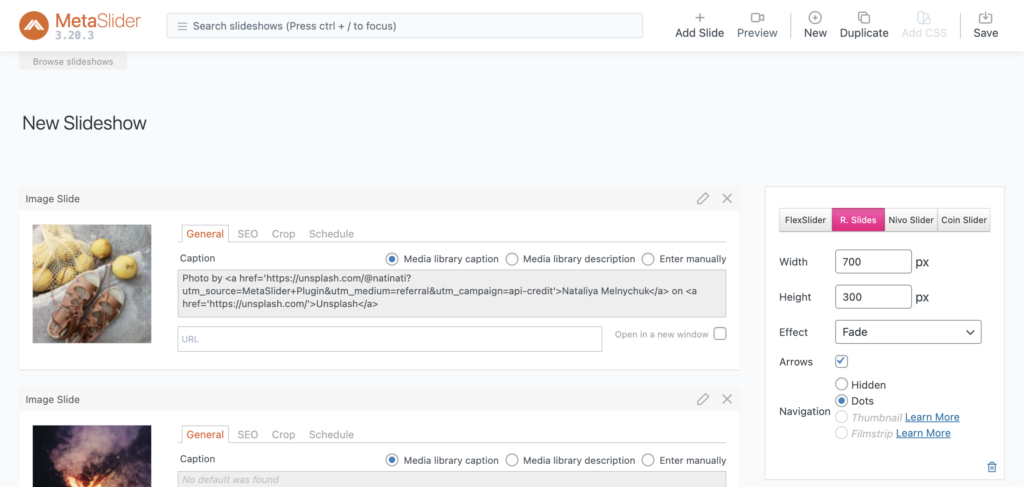
Step 4. In the editor, you will also notice various options like General, SEO, Crop and Schedule. Here’s what they all mean:
General: In the general tab you can enter a caption for your image and also link your image to any URL.
SEO: You can adjust the image title and alt text
Crop: The cropping position of your image
Schedule: With this tab, you can schedule when to start and stop your slider although this is a pro addon
Step 4. You will be able to preview the slide you added. Following these similar steps, you can easily add and create your own carousel. Once you’re done, click on the ‘Save’ button in the top right.

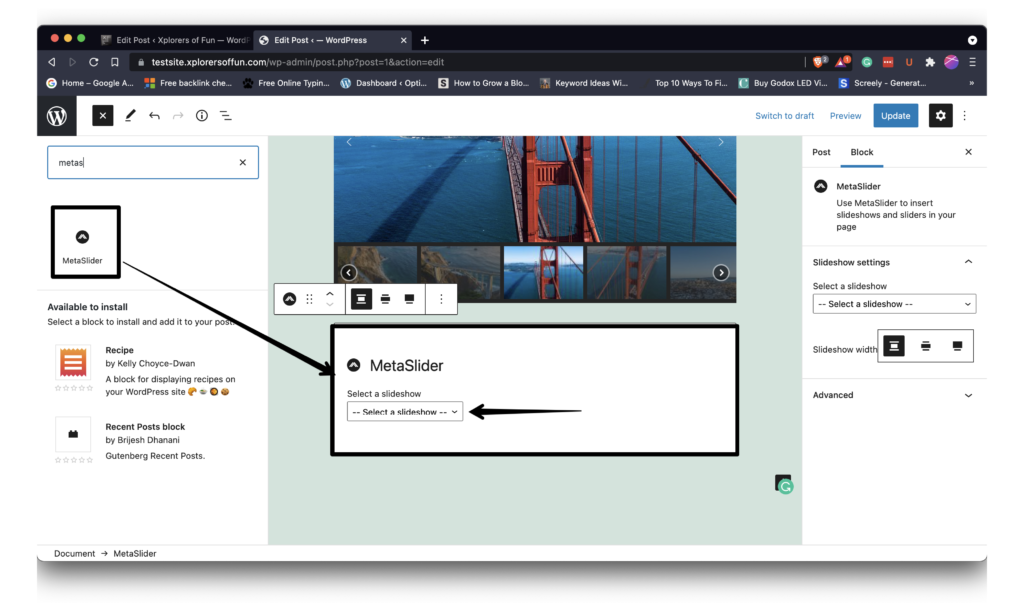
Step 5. To add the slideshow to a blog post or page, go to the post editor and from there click on the ‘+’ icon and search for ‘Metaslider’. Now you will have a drop-down menu where you can select the slider to display
That was it! Now you can create and add unlimited image sliders to your site. For more features like HTML slides, video slides, post sliders, etc, you will have to upgrade to MetaSlider’s paid version
Smart Slider 3

Smart Slider 3 is a really impressive slider maker for WordPress. It’s one of the most advanced slider plugins with a very modern interface. The best part is that it contains many templates which you can use!
Some of its top features are:
- Real time slide editor
- Everything you add is a layer (just like Photoshop)
- Lots of templates available
- Responsive sliders
- Very nice interface
- Compatible with all the page builders like Gutenberg, Elementor, Divi, WPBakery, etc…
Pricing
There is a free version available which is really powerful and is more than enough for most people’s needs. The pro version is also a great buy starting at $49 for a lifetime for one site.

Tutorial
Step 1. After you have downloaded the plugin, go to ‘Smart Slide > Dashboard’ in your WordPress Admin.
Step 2. You can watch the short tutorial or click on the ‘Continue to Dashboard’ button. Now, you will be in the plugin dashboard and from here you can add a new slider.
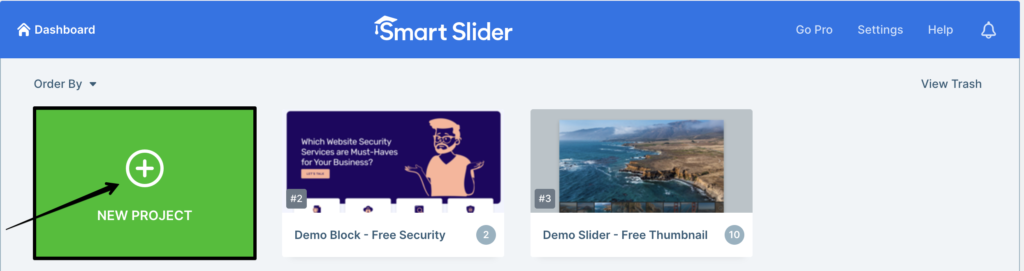
Step 3. Click on the ‘Add New’ project button to create a new slider. You will have the option to either create a blank project or start with a template. We will use a template for this tutorial.
Step 4. We will choose the ‘Free Thumbnail Slider’ template. Click on the ‘Import’ button. Next, you will be able to see all the slides, add new slides and edit the current slides. To edit the current slides, hover over the slider and click on the ‘Edit’ button.
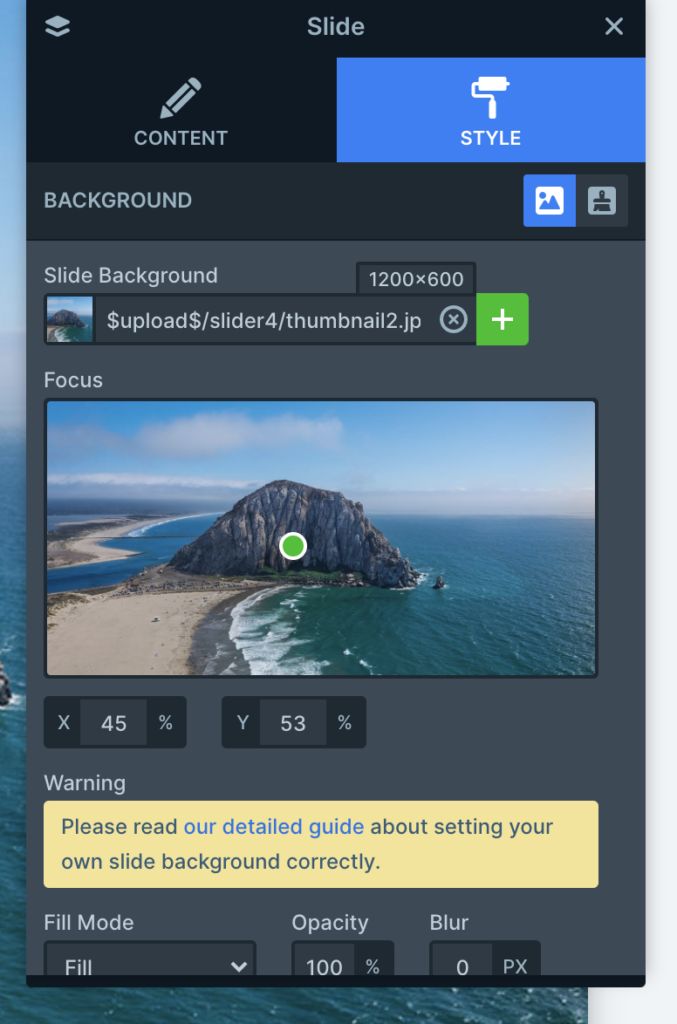
Step 5. Now select the element you want to edit and you will see a small editing window popup. From there you can edit all the things like alignment, image, style, animations, etc…
Step 6. Once you’re done, click on the Save button. If you want to add more slides, then come back to the page in Step 4 and from there click on the ‘Add Slide’ option. From here you can add an image, post, static overlay or dynamic slides.
Step 7. Now you can scroll down a bit and you will see some other settings which you can tinker in your slider.
Step 8. To add the slider to your page, go to the editor and over there search for ‘Smart Slider 3’. Click on the select slider button and choose the one to add. That’s it!
Conclusion
So that was for this tutorial. As you can see that creating a slider isn’t tough. Both the plugins I told above make slider creation and customization really easy within WordPress. Subscribe to my newsletter for more content like this!