This step-by-step tutorial will guide you on how to add a navigation menu to your WordPress website. I’ll show you everything you need to know about them and I’ll also show you how I built the navigation menu on this site!
What Is A Navigation Menu?
A navigation menu contains links to the most important pages of your website. These links help the user to navigate around your website quickly and easily!
Here’s the navigation menu of this site:

Not only is a navigation menu important for user experience, but also for adding structure to your site
The location of your menu shall depend on your theme. Some themes allow only for a header and footer menu while others are more flexible.
How To Add A Menu In WordPress
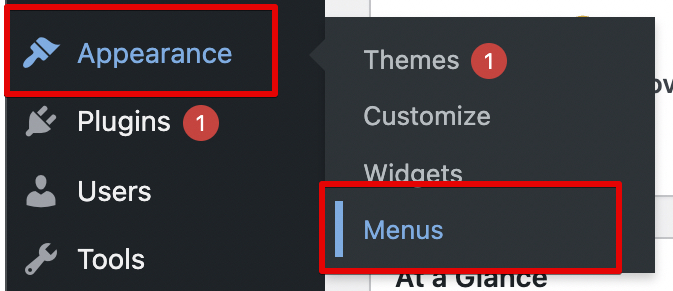
To create a menu, head over to Appearance > Menus. Alternatively, you can click on the ‘Manage Menus’ link in your WordPress dashboard.
Next, you’ll be greeted by this screen:
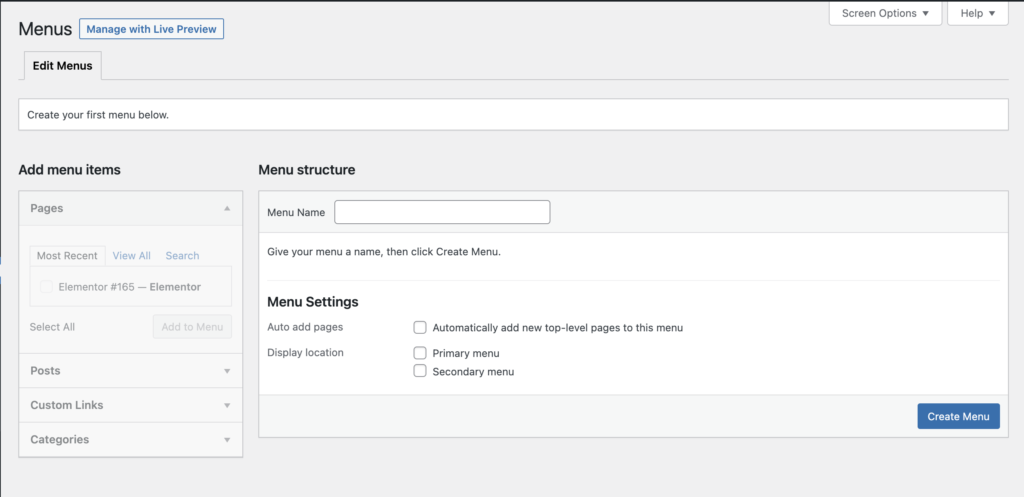
First of all, you’ll have to give your menu a name. This name won’t show up on your site and it’s just for internal management. After that, click on the ‘Create Menu’ button.
Now you’ll be able to edit your menu. To add pages to your menu, go to the ‘Pages’ section on the left-hand side. Next, click on the ‘View All’ link.
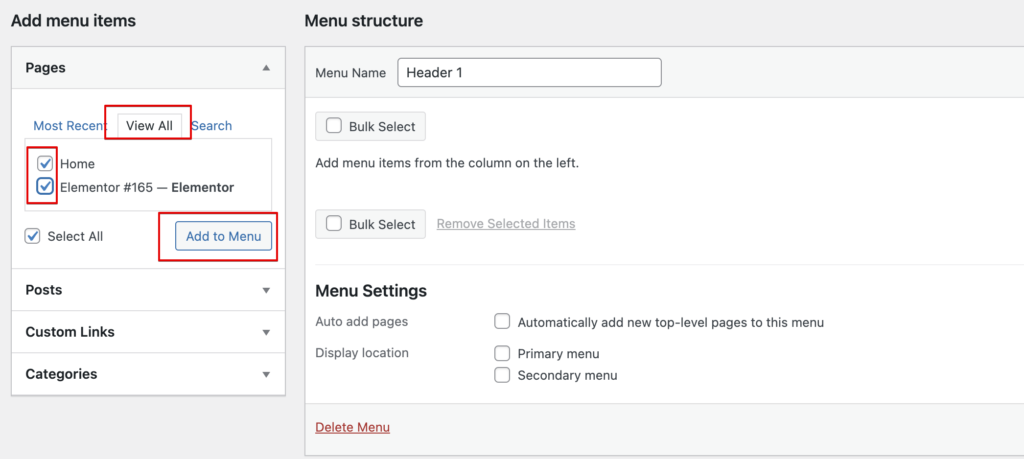
Now, put a checkmark on the pages you want to add to your menu and click on the button that says ‘Add to Menu’.
Voila! You just created a simple menu for your website! Now, you can save it.
How To Add Blog Posts To A Navigation Menu In WordPress
To add blog posts, click on the ‘Posts’ section. Now click on the ‘View All’ link and select the posts to add.
The process is similar to what we did to add pages to our menu.
How To Edit Individual Properties In The Menu
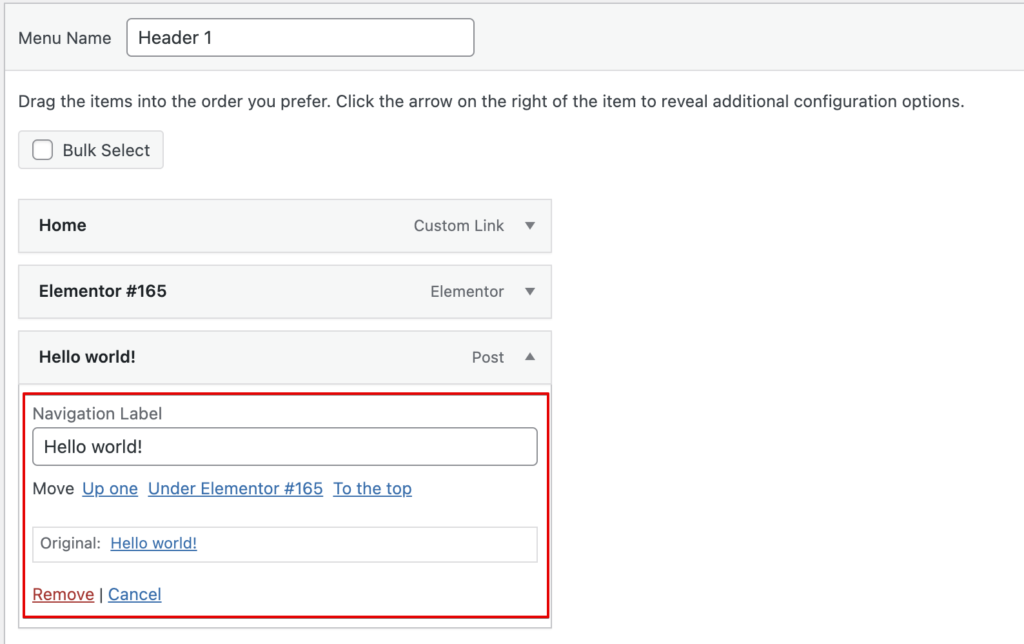
Upon adding pages and posts, you can edit their individual properties like the name or delete them. To do so, click on the arrow at the right of the menu item. Now it shall expand the item and you’ll be able to edit the label and delete it.
How To Add Custom Links To A Navigation Menu
Custom Links allow you to add navigation links to specific pages on your website and even those which are not present on your website.
For example, if you wanted to link to your YouTube channel from your website, you can simply create a custom link that shall take a person to your channel upon clicking it!
To add custom links to your menu, click on the ‘Custom Links’ section. After that, you’ll be shown two fields.
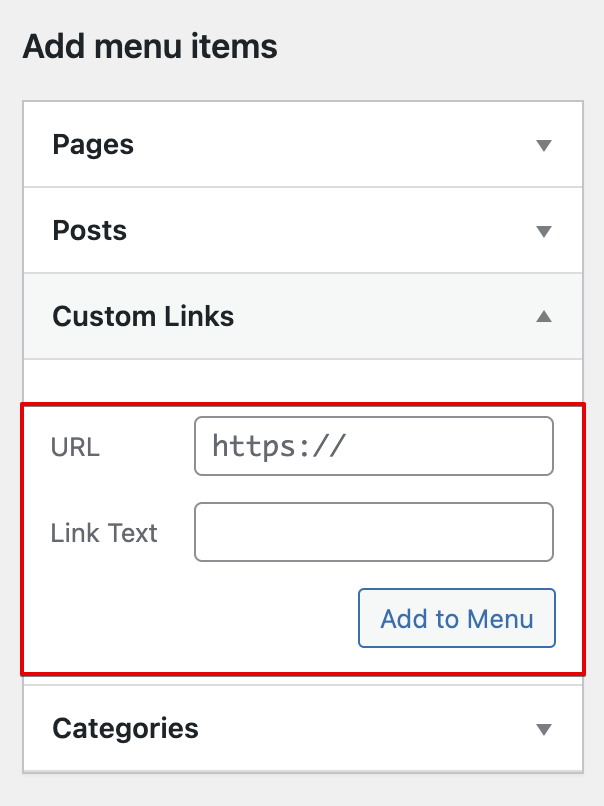
Here you’ll first have to add the URL of the page, and then the text you want your visitor to see. Considering the YouTube channel example, you can add a link to your channel in the URL section and ‘My YouTube Channel’ as the link text.
How To Make A Drop-Down Menu In WordPress
A drop-down menu contains some sub-items under the main link. It’s quite common nowadays and you must have also noticed it on this website.

On this website, I use a dropdown menu for the categories of my blog page, although it can be used for a variety of purposes!
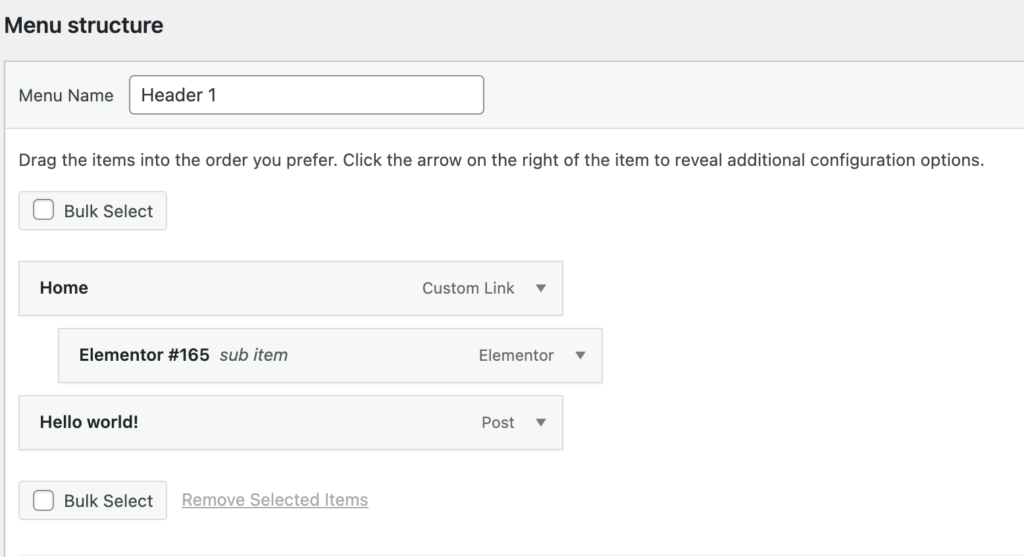
To create such a menu, first of all, add the parent page in the menu editor.
Next, select the sub-pages that you want to add under the parent page from the ‘Pages’ section. After that, you’ll have to drag and drop the subpages under the parent page. WordPress also shows some indentation clues to help you out.
How To Show The Menu On Your Site
Now that you have made the menu, it’s time that people can see it. For this tutorial, I shall be using the default WordPress 2021 Theme.
For making the menu visible, you’ll have to tick one of the ‘Display Locations’.

Every theme supports different display locations, hence you might be seeing different options. If you don’t know which option is which, you can try out each one of them to see which one is the best!
In my case, the ‘Primary Menu’ is at the top of the page, while the ‘Secondary Menu’ is at the bottom of the page.
How To Make A Non-Clickable Menu Item
While creating drop-down menus you might want that the visitor isn’t able to click the parent page or one of the subpages. In that case, there is a neat trick that you can do.
For that, choose the ‘Custom Link’ option for the parent page. For the ‘Label’, write whatever you want to and in the URL field just enter ‘#’.
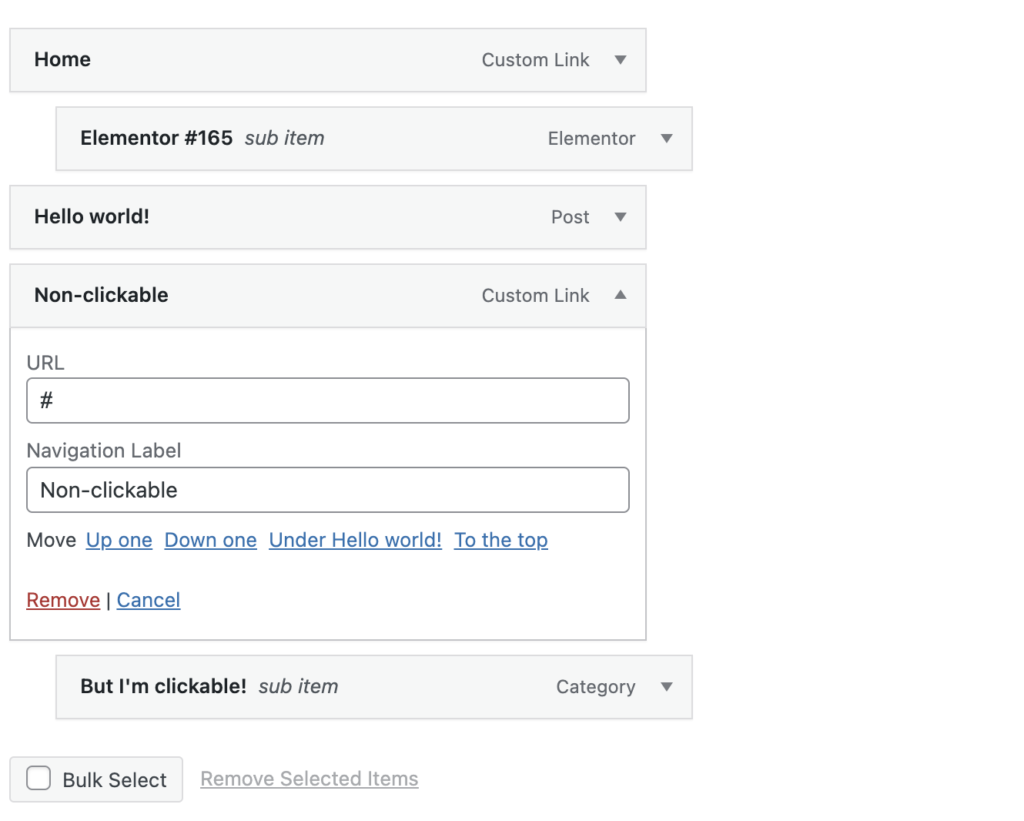
And then you can add the sub-items just like you normally would.
How To Delete Your Menu
Deleting a menu is pretty easy and takes just a click! You can click on the ‘Delete Menu’ link at the bottom of the page to delete your menu.
One thing to remember is that by removing your menu, all the places where it was will become empty.
Final Result
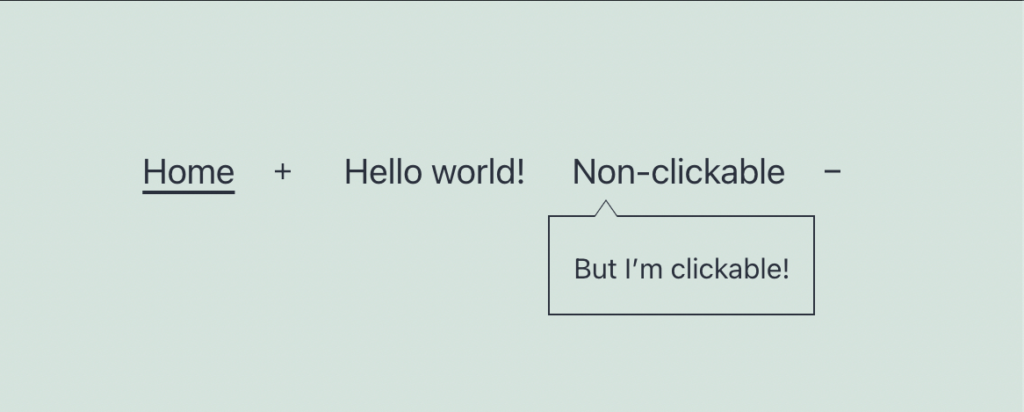
This is how our menu looks on our demo site now:
Conclusion
So that was all about making menus for your website. It’s fairly easy to do and yet it’s quite extensible and you can make something quite simple or quite complex. I hope that you learned something valuable today and it helped you!
Subscribe to my newsletter for more great tutorials and posts like this!



Very nice post. Easy way